
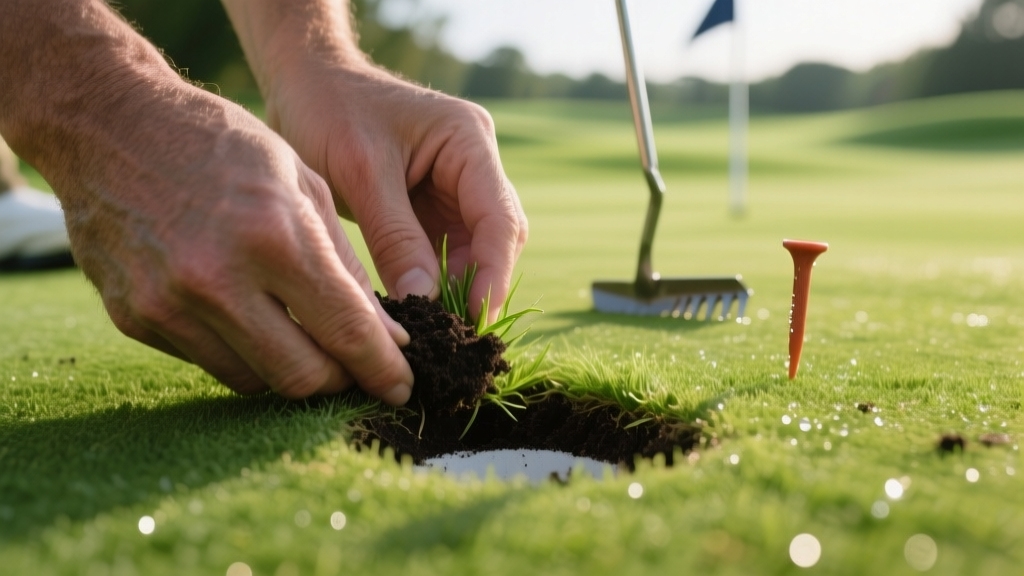
To repair a divot properly, first retrieve the turf chunk if intact, placing it back with grass blades upward and edges aligned. Use a divot repair tool to gently push soil inward around the perimeter, avoiding twisting to prevent root damage.
Fill gaps with a seed-and-sand mix, level the surface, and water lightly to maintain moisture. Prompt, careful repair preserves turf health and course playability. Follow precise steps to ensure efficient recovery and a smooth playing surface.
- Key Takeaways
- Understanding Divots and Their Impact on the Course
- Identifying the Type of Grass on Your Course
- Tools Needed for Effective Divot Repair
- Step-by-Step Guide to Replacing a Divot
- Using a Divot Repair Tool Correctly
- How to Apply Seed and Sand Mixture After Repair?
- Proper Watering Techniques for Divot Recovery
- Best Practices for Repairing Divots on Warm-Season Grasses
- Common Mistakes to Avoid During Divot Repair
- Benefits of Consistent and Proper Divot Maintenance
- Frequently Asked Questions
- Can Divot Repair Improve Golf Ball Trajectory During Play?
- How Often Should Golfers Repair Divots During a Round?
- Are There Environmental Benefits to Repairing Divots Promptly?
- Can Improper Divot Repair Lead to Increased Maintenance Costs?
- Is Divot Repair Etiquette Different for Casual vs. Competitive Play?
- Preserving the Playable Surface Every Golfer Relies On
Key Takeaways
- Use a divot repair tool to gently push soil inward from the edges, avoiding twisting or levering to protect turf roots.
- Replace the turf chunk if intact, aligning grass blades upward and pressing firmly into the soil for better root contact.
- Fill gaps with a sand and seed mix appropriate for the turf type, distributing evenly without overfilling.
- Lightly tamp the repaired area with your foot or club sole to ensure even surface and firm soil-to-root contact.
- Water the repaired divot consistently, preferably early morning or late evening, to maintain moisture and promote seed germination.
Understanding Divots and Their Impact on the Course
What exactly causes divots, and why do they matter for the golf course? Divots form when your golf club strikes the ground after the ball, removing a chunk of turf. This occurs if you hit the ball before reaching your swing’s low point, which can be influenced by inadequate warm-up and poor swing mechanics affecting club head speed.
Divots happen when your club hits the ground after the ball, taking a chunk of turf with it.
Factors like your ball position, posture, hand action, and club lie angle influence the divot’s size and shape. Divots mainly appear on tee boxes, fairways, and practice areas—high-traffic zones prone to turf damage. A scattered pattern causes the most turf removal per swing, leading to greater turf loss overall.
Improper or frequent divots damage turf coverage, leading to uneven surfaces and increased maintenance. Concentrated divot patterns delay recovery more than scattered or linear ones.
Heavy play, especially in hot, humid conditions, stresses turf health, demanding careful divot management to maintain course quality and playability.
Identifying the Type of Grass on Your Course
Identifying the type of grass on your golf course is essential for effective turf management and maintenance. Recognizing turf differences across course areas helps you repair divots properly and maintain turf health.
Greens typically feature cool-season Bentgrass or Poa Annua, which tolerate very low mowing heights for smooth putting surfaces. Bentgrass is especially valued because it performs best during evening and nighttime conditions when stress levels are lower.
Tees and fairways often use warm-season grasses like Bermuda or Zoysia, which withstand traffic and varying mowing heights. Rough areas employ coarser grasses that require less maintenance and are often adapted for shade and drought tolerance.
Consider your region’s climate: warm-season grasses thrive in hotter zones, while cool-season grasses perform best in cooler climates.
Tools Needed for Effective Divot Repair
To repair a divot effectively, you’ll need the right tools, including a divot repair tool and a seed and sand mix tailored to your turf type. Use the tool to gently press soil and seed back into the damaged area without lifting the grass. Proper maintenance of the repair tools helps ensure their longevity and effectiveness.
Afterward, apply the seed and sand mix evenly to promote quick recovery and maintain green surface integrity. Many golfers prefer using a 6-in-1 Divot Tool that combines multiple functions, enhancing efficiency on the course.
Essential Divot Repair Tools
A reliable divot repair tool is essential for maintaining turf integrity and ensuring smooth green conditions. Choose a tool with two prongs designed to lift and smooth turf without tearing. Look for ergonomic handles that provide a secure grip and reduce hand fatigue.
Durable materials like titanium or nickel alloys offer longevity and resist corrosion, ensuring consistent performance. Many top tools also include a removable ball marker, adding convenience during play such as the Callaway 4-in-1.
Portability features such as foldable prongs or belt clips keep your tool accessible during play. Selecting these essentials guarantees efficient, professional-quality divot repairs on the course. Developing proper grip and consistent technique while repairing divots helps maintain course quality and supports overall game improvement.
Seed and Sand Mix
Once you’ve selected the right divot repair tool, preparing the appropriate seed and sand mix becomes your next step for effective turf restoration. Start by blending a base of 80-99% sand with 1-20% grass seed, adjusting ratios for your turf type and local conditions.
For cool-season grasses like creeping bentgrass or Chewings fescue, include seed and consider adding organic matter such as peat to retain moisture. Incorporate a small amount of fertilizer to promote rapid seedling growth. Using proper packaging techniques when transporting your seed and sand mix ensures it remains uncontaminated and ready for use.
Guarantee thorough mixing to distribute seed evenly. Note that mix composition often depends on whether the grass is established by seed or vegetative growth. Before applying, aerate the divot with a pitchfork or aerator prongs to improve soil contact.
Finally, fill the divot completely with your seed and sand mix, optimizing conditions for germination and quick turf recovery.
Step-by-Step Guide to Replacing a Divot
Before replacing a divot, you need to carefully assess the condition of the turf piece to guarantee it’s suitable for reinstallation. Verify that soil remains attached and the turf isn’t shattered. Confirm the piece fits snugly into the original divot without gaps. Wearing appropriate footwear with good grip can help maintain stability during this process.
Assess the turf piece carefully to ensure it’s intact and fits snugly before replacing the divot.
If intact, follow these steps:
- Retrieve the turf chunk carefully to avoid further damage.
- Align the piece with the divot edges, ensuring grass blades face upward.
- Press the piece firmly into the soil using your foot or club sole for root contact. This ensures proper turf contact which is essential for the divot to heal effectively.
- Fill any remaining gaps with a sand and seed mixture to level the surface.
This precise method promotes faster healing and maintains course quality effectively.
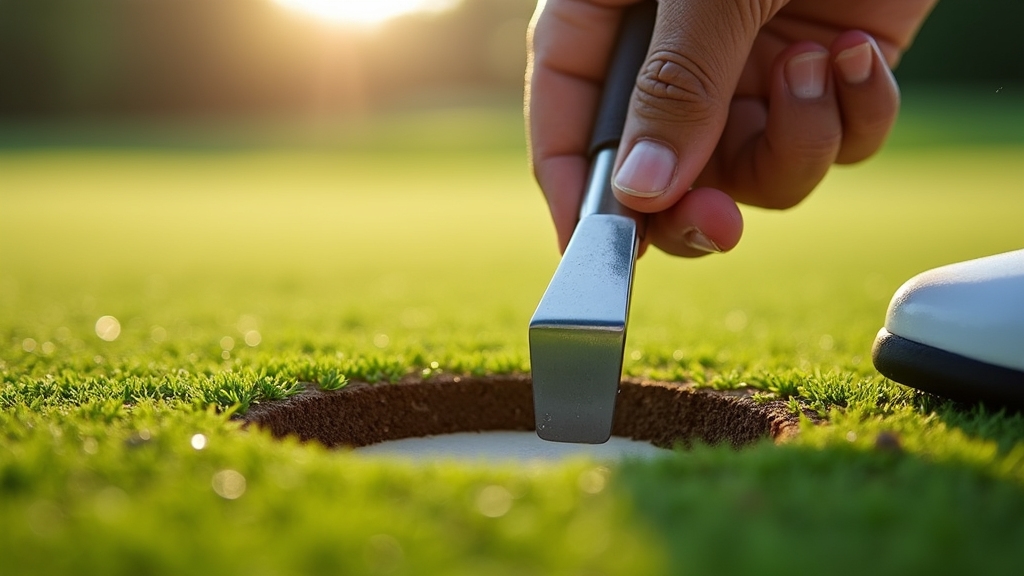
Using a Divot Repair Tool Correctly
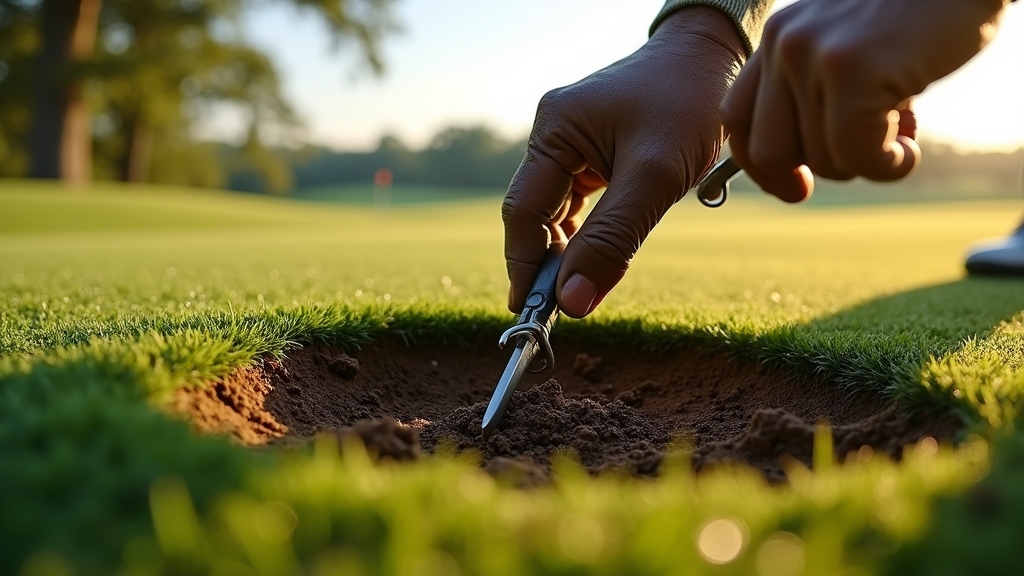
Start by inserting the divot repair tool at a steep angle just outside the divot’s edge to safeguard the turf. Most divot tools have two prongs designed for this purpose. Then, carefully push soil inward around the perimeter without lifting the grass to restore the turf’s structure.
Finally, level the surface gently with your putter to ensure a smooth, even green. Proper weight distribution on the turf helps maintain its health and prevents further damage.
Tool Insertion Technique
Although it may seem straightforward, inserting the divot repair tool correctly is essential to preserving the grass roots and promoting rapid turf recovery. You should insert the tool prongs gently at the outer edge of the ball mark, not the center, to avoid root damage.
Look for an apparent dent or bruised grass near where the ball rested to identify the correct ball mark location. Choosing the right technique is similar to selecting an appropriate golf grip to ensure proper control and consistency.
Use a steep angle to slide the tool into the turf next to the divot, never inside it. Apply a pushing inward motion toward the center from the edges, avoiding vertical prying or twisting. Follow these steps for effective tool insertion:
- Position prongs at the divot’s perimeter, avoiding the center.
- Insert at a steep angle to protect roots.
- Push soil inward using gentle, horizontal motions.
- Work incrementally around the divot’s edges until even.
Turf Edge Adjustment
When you adjust turf edges with a divot repair tool, insert the prongs just outside the divot’s perimeter at a slight angle to gently push the turf inward, reducing the damaged area without harming roots.
Work evenly around the divot’s circumference, applying gentle pressure toward the center to shrink the divot without twisting or levering the tool, which can tear roots. This method is similar to how 48v golf carts handle tough terrain by distributing effort evenly to prevent damage.
Avoid pushing prongs into bare soil or the void; focus on healthy turf edges. After adjusting, lightly compact the edges with your foot to ensure firm soil-to-root contact. This step is essential because it promotes quick turf recovery and smooths the playing surface.
Inspect for gaps and fill any depressions with course-approved divot mix, avoiding overfilling. Maintaining tool sharpness and cleanliness helps mitigate turf damage during adjustment, promoting faster recovery and sustained turf health.
Surface Leveling Methods
Adjusting turf edges carefully sets the stage for proper surface leveling with your divot repair tool. Insert the tool’s prongs at a steep angle just outside the ball mark’s edge, never the center, to protect roots. Prompt repair helps maintain course health and longevity, so addressing divots quickly is essential for course sustainability.
Using proper equipment care techniques during divot repair also helps preserve the turf and underlying root system. Push turf gently from the edges toward the center using a soft folding motion to close the divot evenly. Avoid prying or vertical lifting motions to maintain turf integrity.
Finally, compress the repaired area by pressing down lightly with your shoe or putter, eliminating air pockets and achieving a flush surface.
- Insert prongs at the divot edge, angled steeply, avoiding center insertion.
- Push turf inward gently, working in small sections around the divot.
- Use circular or folding motions to level without uprooting roots.
- Tamp down repair softly to ensure a smooth, even green surface.
How to Apply Seed and Sand Mixture After Repair?
Before applying the seed and sand mixture, make sure the divot is clean of debris and level with the surrounding turf. Proper turf interaction is essential for effective divot repair. Fill the divot flush with the mixture, distributing evenly to ensure uniform seed contact with soil. Avoid overfilling; excess can be brushed off.
Use a high seeding rate within the mix and avoid applying in wet or frozen conditions. Sand bottles are available at designated tee complexes to assist with filling. Soil temperature must exceed 50°F.
For warm-season grasses, sand-only mixes suffice, while cool-season grasses benefit from seed inclusion.
Proper Watering Techniques for Divot Recovery
Although proper watering is often overlooked, it plays a critical role in successful divot recovery by maintaining ideal moisture levels for seed germination and turf regrowth. To optimize watering, focus on timing, frequency, depth, and quality.
Proper watering is essential for divot recovery, ensuring optimal moisture for seed germination and healthy turf regrowth.
- Irrigate early morning or late evening to reduce evaporation and maintain consistent soil moisture without overwatering. Many golf courses dedicate specific staff members to maintaining divot repair zones, highlighting the importance of dedicated divot repair.
- Water multiple times daily on heavily trafficked areas, keeping the divot mix moist but not saturated to prevent fungal issues.
- Use deep, infrequent watering guided by soil moisture meters to encourage deep root growth and enhance turf resilience.
- Incorporate wetting agents and nutrient amendments with irrigation to improve water infiltration, retention, and nutrient availability in the repair zone.
Best Practices for Repairing Divots on Warm-Season Grasses
When repairing divots on warm-season grasses like bermudagrass and zoysiagrass, focus on techniques that support their rapid vegetative recovery. Avoid replacing divot sod, as it rarely reestablishes roots. Instead, fill the divot evenly with straight sand to level the surface and facilitate horizontal stem growth from stolons and rhizomes.
After filling, gently step on the sand to compress and smooth it, enhancing root-to-soil contact and speeding up healing. Perform repairs during active growing periods, typically warm months, to leverage aggressive turf growth.
Maintain proper mowing height and adequate hydration without overwatering to support turf density and recovery. Avoid divot mixes containing seed or soil, as these are ineffective on warm-season grasses that regenerate primarily through vegetative growth.
Common Mistakes to Avoid During Divot Repair
Since proper divot repair directly affects turf recovery and course quality, avoiding common mistakes is essential. To guarantee effective repairs, focus on these critical points:
- Use Tools Correctly: Insert your divot tool gently at the edges, pushing soil inward without excessive force or twisting to avoid root damage.
- Follow Course Rules: Confirm whether to replace turf or fill with sand based on local turf type and course guidelines to promote proper healing. Understanding the turf type is crucial because Bermuda turf favors sand replacement while cool-climate grasses often benefit from turf replacement.
- Avoid Reusing Damaged Turf: Only replace divots with intact turf patches; fragmented or dead turf hinders regrowth and increases erosion risk.
- Tamp and Level Properly: Press the repaired area firmly but not overly compacted, matching surrounding turf height for consistent playability. Proper tamping helps level the turf and promotes root contact with soil, which is essential for quick recovery.
Benefits of Consistent and Proper Divot Maintenance
You’ll enhance course playability by repairing divots promptly, ensuring smooth, consistent turf for every shot. Maintaining proper divot repair supports turf longevity by preserving root contact and soil structure essential for healthy regrowth.
Consistent upkeep prevents turf degradation, reducing maintenance needs and extending the life of your fairways and tees. Additionally, staff training in effective divot repair techniques contributes significantly to maintaining turf health and resilience.
Enhances Course Playability
Although divot repair may seem minor, maintaining consistent and proper divot care directly enhances course playability by preserving a smooth, even turf surface. This ensures reliable ball behavior and reduces unpredictable bounces, improving shot accuracy.
To enhance course playability, focus on:
- Repairing divots promptly to maintain uniform turf, minimizing ball interference and promoting fair play. Prompt repair is especially important on shorter holes where wedges or nine-irons create larger divots that impact turf quality over time.
- Using moisture-retentive divot mixes to accelerate turf recovery, preserving smoothness.
- Encouraging players to fill divots correctly to sustain turf integrity and speed up recovery.
- Reducing rough patches that slow pace of play by creating smoother playing surfaces.
Promotes Turf Longevity
Maintaining consistent and proper divot repair not only improves playability but also plays a crucial role in extending the life of your turf. By promptly filling divots with appropriate mixtures like sand, topsoil, and peat, you support uniform seed germination and root establishment, preventing turf thinning and dieback.
With increased play leading to more turf damage, these repair efforts become even more essential to combat the challenges of higher course traffic. This practice preserves soil structure, reduces compaction, and maintains porosity essential for air and water movement to roots.
Preventing open wounds limits fungal pathogen entry and pest habitat, enhancing turf resilience against biotic stresses. Adapting repair techniques to seasonal growth phases ensures ideal recovery and sustains turf vitality.
Frequently Asked Questions
Can Divot Repair Improve Golf Ball Trajectory During Play?
Yes, repairing divots can improve your golf ball trajectory during play. When you fix divots, you restore the turf’s evenness, allowing for consistent ball lies and cleaner club contact. This consistency helps maintain proper launch angles and spin rates, reducing errant shots.
How Often Should Golfers Repair Divots During a Round?
You should repair every divot you create immediately after each shot. Prompt repair maintains turf integrity, prevents soil compaction, and accelerates recovery. Failing to fix divots frequently can lead to uneven surfaces and slower turf healing.
Use a divot tool to lift and press the turf back gently, then tamp it down lightly. Consistent repair during your round helps preserve course quality and playability for yourself and others.
Are There Environmental Benefits to Repairing Divots Promptly?
Absolutely, repairing divots promptly can transform you into an environmental hero on the course. By fixing divots quickly, you prevent soil erosion, maintain healthy turf, and reduce weed invasion. You help the grass regrow faster, improving water absorption and limiting runoff.
Plus, you support carbon sequestration and air purification. Your action also sustains biodiversity and reduces the need for chemical inputs, promoting sustainable course management and a balanced ecosystem.
Can Improper Divot Repair Lead to Increased Maintenance Costs?
Yes, improper divot repair directly increases maintenance costs. You’ll face higher labor expenses as staff spend extra time re-seeding and fixing damaged turf. You’ll also incur greater chemical costs from increased herbicide and fungicide applications needed to control weeds and diseases in unrepaired areas.
Additionally, equipment wear intensifies due to frequent repairs, raising fuel and maintenance expenses.
Is Divot Repair Etiquette Different for Casual vs. Competitive Play?
You’ll find divot repair etiquette differs markedly: in competitive play, 100% adherence is expected, with precise turf replacement or sand filling, ensuring course integrity and fairness.
In casual settings, you can be less meticulous—prompt repair is encouraged but not enforced, and approximate fixes are acceptable. Carrying tools is mandatory in tournaments, while casual rounds rely on gentle reminders.
Preserving the Playable Surface Every Golfer Relies On
Think of each divot repair as planting a seed of care, restoring the course’s green canvas stroke by stroke. By accurately identifying grass types, using the right tools, and applying precise watering, you rebuild the turf’s strength and resilience.
Avoid common mistakes to keep your repair efforts sharp and effective. Consistent maintenance not only heals the ground beneath your feet but also preserves the smooth, playable surface every golfer depends on.
Your careful touch shapes the course’s future.