
To measure your golf club’s loft, place the clubhead on a flat, level surface with the sole fully grounded.
Support the shaft perfectly vertical using a block or stand, verified by a spirit level or inclinometer.
Square the clubface so grooves are perfectly horizontal and mark the center with a fine-tip marker.
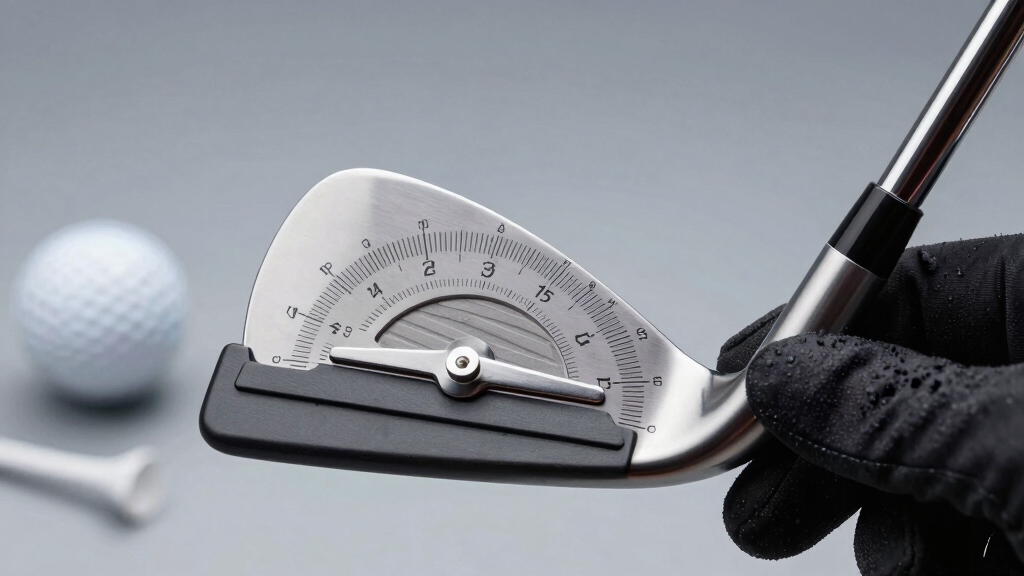
Then, use a calibrated digital inclinometer or protractor aligned at that center to read the angle between the face and vertical.
Following this method guarantees precise static loft measurement. Explore detailed steps for irons, woods, and advanced techniques ahead.
- Key Takeaways
- What Loft Means and Why It’s Important?
- Understanding Static vs. Dynamic Loft in Golf Clubs
- Tools You Need to Measure Loft at Home
- How to Set Up Your Golf Club for Loft Measurement?
- How to Square the Clubface for Accurate Loft Measurements?
- Measuring Loft on Irons and Wedges Step-by-Step
- Measuring Loft on Woods and Drivers Step-by-Step
- Using Digital Inclinometers and Smartphone Apps for Loft
- When to Consult a Professional for Loft and Lie Adjustments?
- Frequently Asked Questions
- Precision Loft Measurement for Peak Performance
Key Takeaways
- Use a digital inclinometer or protractor, zeroed against a vertical reference, to measure the angle between clubface and vertical plane.
- Support the shaft vertically at 90° with a wood block and confirm verticality using a spirit level or inclinometer.
- Square the clubface with a face squaring device to ensure grooves are horizontal and the face rests flat before measuring.
- Mark the geometric center of the clubface with a Sharpie for consistent and repeatable placement of the measuring tool.
- Place the clubhead on a flat, level surface with the sole fully contacting the ground while holding the shaft vertical for accurate static loft reading.
What Loft Means and Why It’s Important?
Although it might seem like just a simple angle, loft plays a vital role in your golf club’s performance by determining the trajectory and spin of your shot.
Loft is the angle between the clubface and a vertical plane when you address the ball, with grooves perfectly horizontal. Higher loft angles produce higher ball flights and increased spin, which affect distance control and shot shape.
For example, drivers usually have lofts between 8° and 12°, while wedges range up to 64°, influencing how the ball reacts on landing.
Accurately understanding loft helps you select the right club and optimize your swing dynamics. Precise loft measurement also ensures consistency across your set, essential for reliable shot dispersion and predictable ball flight.
The AW iron is a prime example of how specific loft angles are designed to fill distance gaps and improve approach shot precision.
Understanding Static vs. Dynamic Loft in Golf Clubs
When you measure loft, you’re dealing with two distinct concepts: static and dynamic loft.
Static loft is the angle between the clubface and vertical plane when the club is at rest in a normal address position. In this position, the shaft is perfectly vertical and the grooves are horizontal. This measurement defines the club’s baseline trajectory potential.
Static loft measures the clubface angle relative to vertical when the club rests at address, setting baseline trajectory.
Dynamic loft is the effective loft angle at impact, influenced by your swing mechanics. It specifically depends on how much you tilt the shaft forward or backward (shaft lean). Dynamic loft directly affects ball launch angle and spin.
Understanding this difference is essential because static loft alone doesn’t predict shot behavior. You must consider how your swing alters loft dynamically to optimize launch conditions and shot control.
This is especially important when fitting clubs or analyzing performance.
The club’s lie angle also plays a critical role in how loft translates to the shot, affecting turf interaction and shot accuracy.
Tools You Need to Measure Loft at Home
To measure loft accurately at home, you’ll want to grab a few essential tools. A digital inclinometer or even a protractor works great—just make sure you have a vertical support block to keep the shaft standing nice and straight.
Now, if you’re after the top-notch precision, professional loft gauges are the way to go. But don’t worry if you’re not ready to invest in those; affordable tools and smartphone apps can still get you measurements within about one degree of accuracy.
Choosing the right tools based on your hand and club measurements can improve your setup, similar to how selecting the correct grip size enhances golf performance.
Essential Measurement Tools
Getting accurate loft measurements at home calls for the right set of tools that balance precision with accessibility. You’ll need devices that guarantee the clubface is perfectly square and the shaft is vertical, as any deviation affects the loft reading.
Here are essential tools to have on hand:
- Digital inclinometer or protractor: Measures angles with reasonable accuracy; zero it against a vertical reference.
- Vertical wood block: Provides a 90° support for the shaft to ensure proper club positioning.
- Face squaring device: Vital for irons and wedges to align the clubface flat and square.
- Sharpie marker: Marks the face center for consistent placement of measuring tools.
- Spirit level: Confirms the flatness of your work surface, preventing skewed readings.
Using these tools correctly guarantees loft measurements that reflect true club specifications. Additionally, ensuring proper grip fitting and alignment can indirectly influence loft measurement accuracy by maintaining consistent club handling and positioning during the process, emphasizing the importance of proper grip fitting.
Affordable Home Equipment
Several affordable tools enable accurate loft measurement at home without professional equipment.
You’ll need a digital inclinometer or a protractor, both costing around £10, to measure the angle between the clubface and vertical.
Use a vertical wood block set precisely at 90° to support the shaft in a normal address position.
A face squaring device, essential for irons and wedges, guarantees the clubface is perfectly perpendicular to the ground, as visual alignment is unreliable.
Mark the center of the clubface with a Sharpie to position your measuring tool consistently.
Before measuring, verify your tools’ accuracy by zeroing the inclinometer on the vertical block.
These tools provide a practical, cost-effective way to measure loft, though they lack the precision of professional clubmakers’ gauges.
For best results, ensure measurements are taken at room temperature (around 70–75°F) to avoid errors caused by material expansion or contraction due to temperature effects.
Digital Apps Advantages
Digital apps frequently streamline the process of measuring golf club loft by leveraging your smartphone’s built-in sensors for accurate angle detection. You can use these apps to approximate loft within 1°, making them practical for home use. They eliminate the need for bulky, expensive protractors or gauges, combining convenience with reliable precision.
To maximize accuracy, make certain the clubface is squared and the shaft is vertical during measurement.
Key advantages include:
- Instant angle readings via inclinometer or level functions
- User-friendly interfaces guiding proper club positioning
- Portability; your phone is always on hand
- Cost-effective, as most apps are free or low-cost
- Digital data can be saved or shared for fitting comparisons
These tools provide a technical yet accessible method to verify your club loft efficiently at home, especially when paired with accurate swing data from advanced golf launch monitors for comprehensive club analysis.
How to Set Up Your Golf Club for Loft Measurement?
To measure loft accurately, start by positioning your club so the shaft is standing perfectly vertical—like, 90° to the ground.
It’s super important that the clubface grooves are horizontal. This keeps everything aligned correctly, especially when you’re working with irons and wedges.
Oh, and here’s a handy tip: grab a Sharpie and mark the center of the clubface. This little step makes sure you can consistently place your measuring tool in the same spot every time.
Trust me, it helps keep things precise!
Also, ensuring the clubface is perpendicular to the shaft during measurement helps improve accuracy.
Position Club Vertically
Start by positioning your golf club so the shaft stands perfectly vertical at a 90° angle to the ground. This vertical alignment is critical for accurate loft measurement, as loft angles are defined relative to a vertical shaft.
Use a stable, flat surface verified with a spirit level to support the club. A vertical wood block can help maintain consistent shaft position during measurement. Make certain the shaft remains immobile to prevent skewing results.
Place the club on a flat, level surface. Use a 90° vertical support block for the shaft. Verify verticality with a spirit level or inclinometer.
Hold the club steady without tilting or leaning. Confirm vertical position before proceeding to face alignment.
Proper vertical positioning makes certain your loft readings reflect true static loft.
For accurate and repeatable measurements, it is essential to position the club with the sole fully contacting ground, ensuring consistent reference points.
Ensure Grooves Are Horizontal
Although positioning the club vertically is essential, you must also guarantee the grooves on the clubface are perfectly horizontal before measuring loft. Horizontal grooves confirm the face angle aligns correctly, preventing skewed loft readings.
Use a flat surface and a face squaring device to verify groove alignment precisely. Visual checks won’t suffice; rely on tools for accuracy.
| Step | Tool Required | Purpose |
|---|---|---|
| Align club vertically | Vertical wood block | Maintain 90° shaft position |
| Square grooves | Face squaring device | Confirm grooves are horizontal |
| Verify alignment | Spirit level or app | Confirm flat, level clubface |
This setup guarantees consistent loft measurements, critical for accurate club fitting and performance analysis. Ensuring groove maintenance before measurement will help preserve the clubface’s true angle and improve the reliability of your loft readings.
Mark Face Center
Accuracy hinges on consistently identifying the face center before measuring loft. This critical step guarantees your protractor or inclinometer aligns precisely, eliminating measurement errors.
To mark the face center:
Position the club in a normal address stance with a vertical shaft. Use a face squaring device to orient the clubface perfectly square.
Identify the geometric center between heel and toe, top and bottom of the face. Mark the exact center with a fine-tip Sharpie for consistent reference.
Avoid guesswork; precise centering improves repeatability and accuracy. This method is especially crucial for woods, where loft is measured at the face center.
For maintaining the clubface, consider methods like removing paint fill to ensure an accurate and clean measurement surface.
How to Square the Clubface for Accurate Loft Measurements?
Getting the clubface perfectly square is essential for reliable loft measurements, especially with irons and wedges where visual alignment won’t cut it.
To achieve this, use a face squaring device designed to hold the clubhead firmly with grooves horizontal and face flat against the device.
Position the shaft vertically at 90° to the ground, supported by a vertical block if needed, to maintain the correct lie angle.
The face must rest flush on the device to prevent tilt, which would skew the loft reading.
Mark the face center with a Sharpie beforehand to place your measuring tool consistently.
Avoid relying on eye judgment; even minor face rotation alters loft angle markedly.
This precise squaring step guarantees your subsequent angle measurement accurately reflects the club’s true static loft.
Measuring Loft on Irons and Wedges Step-by-Step
Before you begin measuring loft on irons and wedges, make sure the clubface is perfectly squared. The shaft should be positioned vertically at 90° to the ground. This setup guarantees accuracy.
Then, follow these steps precisely:
Place the clubhead on a flat, level surface with the shaft vertical. Use a face-squaring device to hold the clubface perfectly flat. Mark the center of the clubface with a Sharpie for consistent placement.
Position a digital inclinometer or protractor perpendicular to the grooves on the face. Record the angle displayed, which reflects the static loft.
Verify your measuring tool’s calibration before use. This process yields precise loft measurements essential for consistent ball trajectory and spin control in irons and wedges.
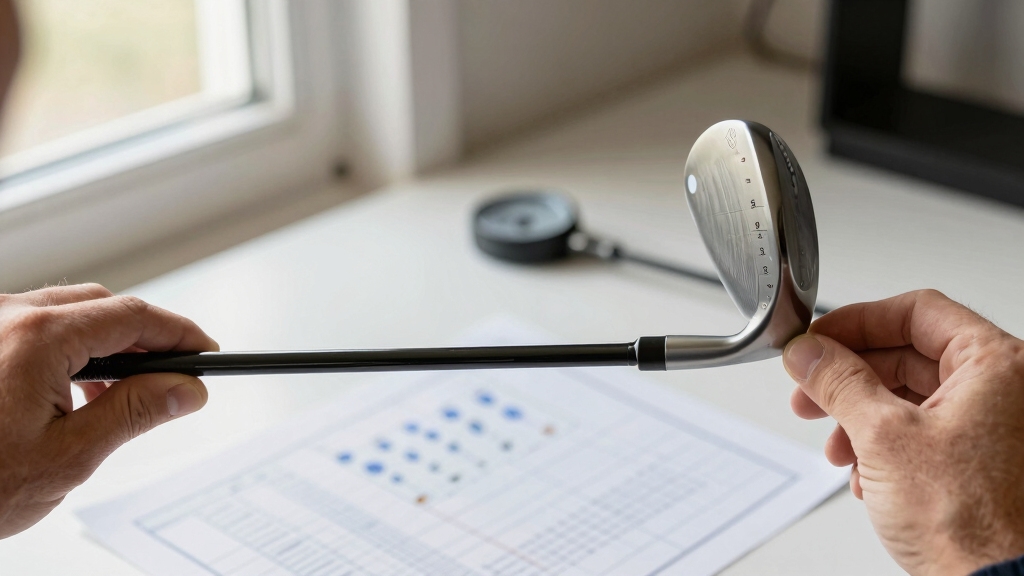
Measuring Loft on Woods and Drivers Step-by-Step
To measure the loft on woods and drivers, start by positioning the clubhead so the shaft stands perfectly vertical. This ensures a true static loft reading.
Place the club on a flat, level surface, confirming the shaft’s 90° angle with a vertical wood block or similar support. Mark the center of the clubface with a Sharpie to provide a consistent reference point.
Align your protractor or inclinometer precisely at this marked center, ensuring the tool sits flat against the face. Read the loft angle directly from your measuring device.
Using Digital Inclinometers and Smartphone Apps for Loft
Measuring loft on woods and drivers with traditional tools sets a solid foundation.
Digital inclinometers and smartphone apps offer a convenient alternative for quick and reasonably accurate readings. You can reliably measure loft angles within about 1°, which is sufficient for most home fitting or verification tasks.
To use these tools effectively:
Zero the inclinometer on a vertical reference, like a wooden block.
Position the club with the shaft vertical and face squared.
Align the digital tool perpendicular to the grooves at the face center.
Use smartphone apps with built-in levels or rulers designed for golf loft measurement.
Verify app calibration regularly against a known angle or physical gauge.
This method balances accessibility with technical accuracy. It streamlines your loft measurement process without specialized equipment.
When to Consult a Professional for Loft and Lie Adjustments?
Although you can perform basic loft and lie measurements at home, you should consult a professional when precise adjustments are necessary to optimize your club’s performance.
Basic loft and lie checks can be done at home, but precise tuning requires a professional’s expertise.
Professionals use specialized loft and lie machines that provide accuracy within a fraction of a degree, guaranteeing your clubs meet exact specifications.
If you’re experiencing inconsistent ball flight, mishits, or suspect incorrect lie angles, a certified clubmaker can diagnose and correct these issues.
They also consider dynamic factors like shaft lean and impact conditions, which home tools can’t replicate.
Additionally, professional fitting sessions incorporate launch monitors to tailor loft and lie angles to your swing characteristics, maximizing distance and accuracy.
When adjusting adjustable hosels or modifying wedges, expert intervention preserves structural integrity and consistent shot behavior, which is essential for competitive play.
Frequently Asked Questions
How Does Loft Affect Ball Spin and Distance Consistency?
Loft directly influences your ball’s spin and distance consistency by controlling launch angle and spin rate.
Higher loft increases backspin, offering better control and softer landings but reduces roll and total distance.
Lower loft decreases spin, promoting longer rollouts but less control.
If your loft’s inconsistent, your shot distances vary unpredictably.
Keeping loft precise guarantees consistent ball flight and distance, helping you optimize trajectory and spin for reliable performance.
Can Loft Adjustments Improve My Golf Swing Mechanics?
Like a sculptor refining a masterpiece, adjusting loft can subtly improve your swing mechanics by promoting better strike conditions.
When you tweak loft, you influence your club’s dynamic behavior, altering launch angle and spin rates. This encourages a more consistent swing path and impact position.
This precision can help you maintain proper wrist angles and shaft lean. Ultimately, it enhances control and power while reducing compensations that lead to erratic shots.
What Are Common Loft Ranges for Hybrid Golf Clubs?
You’ll typically find hybrid golf clubs with lofts ranging from about 16° to 27°.
Lower-lofted hybrids, around 16° to 19°, replace long irons like 2- or 3-irons. Mid-lofted ones, 20° to 24°, cover 4- to 5-irons.
Higher lofts, up to 27°, often substitute for 6- or 7-irons. Choosing the correct loft depends on your distance needs and trajectory preferences to optimize shot consistency and control.
How Does Weather Impact Loft Measurement Accuracy?
Weather can throw loft measurements off like a tornado in a teacup.
Moisture, temperature, and wind affect your tools and club materials.
Metal can expand or contract slightly, changing angles.
High humidity can fog digital inclinometers, reducing accuracy.
Always measure indoors or in stable conditions, using calibrated tools.
If you must measure outside, double-check with a professional device later to guarantee precision remains intact despite environmental variables.
Are There Loft Standards Across Different Golf Club Brands?
Yes, loft standards vary somewhat across brands, but most adhere to industry norms to guarantee consistent performance.
You’ll find drivers typically between 8°-12°, pitching wedges around 42°-46°, and lob wedges near 58°-64°.
However, manufacturers tweak lofts to optimize ball flight or fit their design philosophy.
When comparing clubs, check exact loft specs since “standard” can differ by a few degrees, affecting trajectory and spin markedly.
Precision Loft Measurement for Peak Performance
Measuring your golf club’s loft is like tuning a finely crafted instrument. Precision matters. By understanding static and dynamic loft, using the right tools, and ensuring your clubface is square, you’ll get accurate readings every time.
Whether you’re adjusting irons or drivers, consistent loft measurement sharpens your game. When in doubt, don’t hesitate to seek a professional’s expertise to fine-tune your clubs.
Mastering loft measurement gives you control over trajectory and distance, essential for peak performance.