
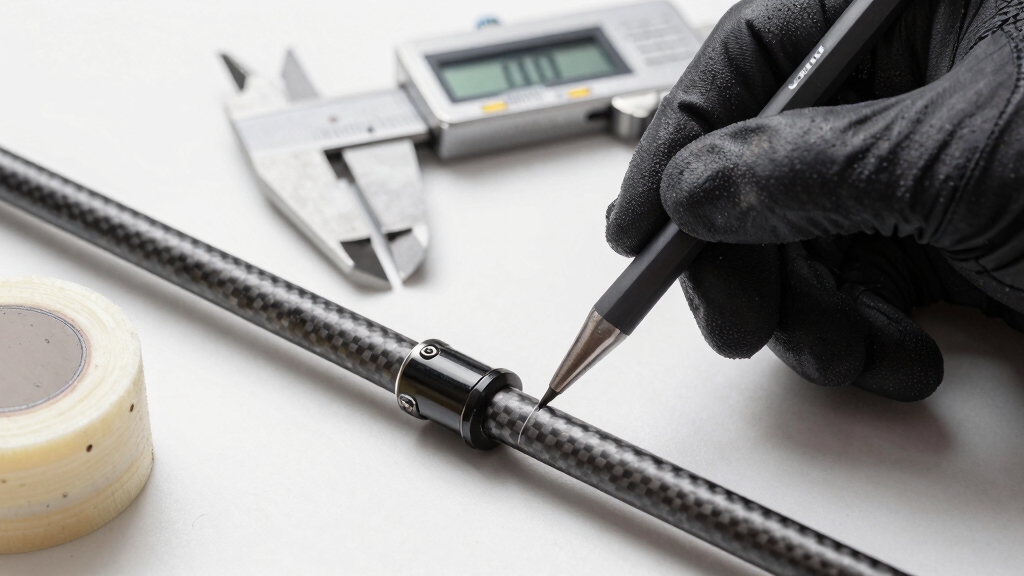
To cut a graphite golf shaft, first measure your desired length precisely, marking the cut line with masking tape to prevent splintering. Clamp the shaft securely using padded, rubberized clamps away from the cut zone.
Use a fine-tooth saw or an abrasive rotary tool, cutting slowly with light pressure while rotating the shaft for a square, clean cut. After cutting, smooth and prepare the tip carefully to guarantee proper fit and performance.
You’ll find detailed steps and safety tips ahead.
- Key Takeaways
- Measure Your Graphite Shaft Before Cutting
- When to Trim the Butt End vs. the Tip End?
- Choose the Best Tools for Cutting Graphite Shafts
- Secure Your Shaft Safely for Cutting
- How to Cut Your Graphite Shaft Step-by-Step?
- Minimize Splintering and Graphite Dust During Cutting
- Square and Smooth the Cut End Properly
- Prepare the Graphite Shaft Tip for Assembly
- Avoid Common Mistakes When Cutting Graphite Shafts
- Frequently Asked Questions
- How Does Cutting Affect the Flex and Performance of My Graphite Shaft?
- Can I Reuse a Previously Cut Graphite Shaft for Another Club?
- What Grip Size Changes After Shortening a Graphite Shaft?
- How Long Should I Wait Before Installing a New Grip After Cutting?
- Are There Special Storage Tips for Cut Graphite Shafts?
- The Final Cut That Elevates Your Game
Key Takeaways
- Measure and mark the exact cut line on the graphite shaft using masking tape to ensure a clean, precise trimming point.
- Secure the shaft with a rubber or urethane clamp to evenly distribute pressure and prevent damage during cutting.
- Use a motorized chop saw with an abrasive disc or a fine-toothed rod saw for smooth, accurate cuts on graphite.
- Apply a lubricant or solvent during cutting to reduce heat buildup and minimize fiber splintering.
- Trim the tip end first to adjust shaft flex, then butt end to fine-tune length without altering flex characteristics significantly.
Measure Your Graphite Shaft Before Cutting
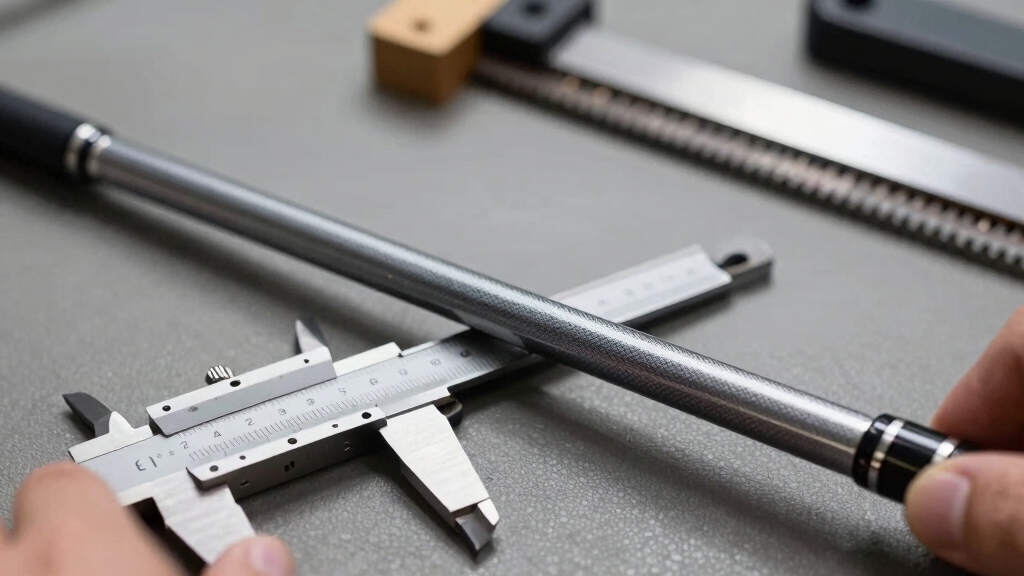
Before you cut your graphite shaft, start by measuring the overall club length accurately while it’s fully assembled.
Use a rigid 48″ ruler rather than tape, placing the club sole flat on the ground with heel and toe touching.
Align the ruler’s edge along the back of the shaft or hosel, and read the length to the end of the grip cap, noting it adds roughly 1/8″ to the playing length.
For an unassembled shaft, measure from butt to tip along a flat surface, ensuring it’s straight and unbowed. Remember that shaft length affects the swing mechanics, so precise measurement is crucial. Proper wrapping of the hosel will ensure a smooth transition and proper fit when reassembling the shaft.
Determine hosel depth by inserting the tip fully into the clubhead, marking the shaft at the hosel edge, then measuring from tip to mark.
Record all measurements carefully before marking your cut line.
When to Trim the Butt End vs. the Tip End?
When it comes to trimming your clubs, you’ll want to start with the tip end. This is where you can adjust the shaft flex and make sure the clubhead fits just right, all according to the manufacturer’s specifications. It’s pretty straightforward—just follow what they recommend!
Before trimming, make sure to measure hosel depth by inserting the shaft tip into the clubhead and marking the shaft next to the hosel to ensure a proper fit. Note that shafts like the Pro 115 and Apollo Shadow use a .370″ parallel tip diameter, making precise tip trimming essential for a secure fit.
Now, when you’re looking at the butt end, that’s a bit different. Trimming the butt end mainly helps you control the final length of the club without really messing with the flex. So, you’ve got to think about what you want to achieve.
Adjusting the butt length allows customization to your swing speed and comfort, especially when using shafts designed for vibration dampening and enhanced feel.
In the end, choosing which end to trim really depends on finding that sweet spot where you maintain the desired flex characteristics while also getting the correct overall length. It’s all about balancing those two factors! Proper trimming helps maximize the performance benefits offered by shafts with customizable length and flex options.
Butt End Trimming Benefits
When fine-tuning a graphite golf shaft’s length and feel, trimming the butt end offers distinct advantages over tip trimming.
Butt trimming minimally affects overall flex since the butt section is stiff and thicker, preserving the shaft’s intended flex profile. It primarily fine-tunes playing length and feel without aggressive stiffness changes.
A 1-inch butt trim produces only a minor change in overall stiffness, making it a practical choice for most players seeking subtle adjustments to their shaft length without disrupting performance minimal stiffness change. This method also allows golfers to maintain proper swing weight balance, which is crucial for consistent swing dynamics.
Additionally, butt trimming substantially lowers swing weight, shifting balance toward the hands, which can improve control and accuracy.
| Aspect | Butt End Trimming |
|---|---|
| Flex Change | Minimal |
| Swing Weight Impact | Decreases (~6 points/in) |
| Control & Accuracy | Improves consistency |
Use butt end trimming to customize length and feel without compromising shaft performance, especially when prioritizing control and consistent ball striking.
Tip End Trimming Effects
Butt end trimming adjusts length and swing weight with minimal impact on flex, but altering shaft stiffness requires cutting from the tip. The tip section is the most flexible part of a graphite shaft, so removing length there markedly increases effective stiffness—about one full flex stiffer per inch trimmed.
This tip trimming makes the shaft feel firmer or boardier, especially in the lower shaft, changing the bend profile and reducing dynamic loft. Tip trimming also lowers launch angle and spin, favoring a more penetrating ball flight but risking harsh feel or difficulty elevating the ball if overdone.
Note that removing 1″ at the tip typically equals one flex stiffer, which helps when swing speed falls between two flex ratings. Use tip trimming to fine-tune flex and performance without altering grip-to-ground length. Conversely, trim the butt end primarily to adjust length and swing weight while preserving shaft stiffness characteristics.
Additionally, precise tip trimming can help optimize ball flight characteristics to better suit individual swing styles and conditions.
Choosing Based On Flex
Although both butt and tip trimming alter a graphite shaft’s characteristics, choosing the correct method depends largely on the desired flex adjustment and performance outcome.
Different trimming approaches affect the shaft’s stiffness distribution differently, with tip trimming removing the most flexible section and butt trimming removing the stiffest section, which influences overall shaft behavior stiffness distributioshafts being a fibrous material held togethen. Consider the shaft’s torque and weight, as these factors also impact launch and control when making trimming decisions.
Trim the butt end primarily when you need to shorten the club while maintaining the manufacturer’s intended flex and bend profile. This approach slightly increases stiffness but causes minimal flex change, ideal if your current flex suits your swing and only length is an issue.
Butt trimming preserves the shaft’s original launch angle and spin characteristics, keeping performance consistent. Conversely, trim the tip end to firm up the shaft’s flex and reduce excessive launch or spin.
Approximately 1 inch of tip trim corresponds to one full flex stiffer. Use tip trimming when your shaft feels too soft or you want a lower ball flight without altering length or swingweight. Since tip trimming affects the shaft’s most flexible section, it can also reduce shaft torque, influencing shot accuracy and stability.
For combined adjustments, trim the tip first, then the butt as needed. This sequence allows for precise customization to match your swing speed and desired ball trajectory while optimizing shaft performance.
Choose the Best Tools for Cutting Graphite Shafts
To get the cleanest cuts on graphite shafts, you’ll need to select tools designed specifically for composite materials. Proper preparation and cleaning of the shaft before cutting can prevent damage and ensure clean edges, enhancing material compatibility.
Motorized chop saws with abrasive discs deliver square, splinter-free cuts ideal for frequent use. These saws often employ a cutting disc rather than a traditional saw blade to handle both metal and graphite effectively. Manual rod saws with tungsten-carbide blades offer precise, low-cost solutions for occasional cutting.
Rotary tools with thin cut-off wheels enable detailed trimming but require careful speed control to avoid damage. Using appropriate lubricant or solvent during cutting can reduce heat and minimize fiber splintering.
| Tool Type | Key Feature | Best Use |
|---|---|---|
| Motorized Chop Saw | Abrasive disc, powerful motor | Frequent, precise shaft cutting |
| Rod Saw / Hacksaw | Carbide grit blades | Single shafts, manual operation |
| Rotary Tools | Thin cut-off wheels, variable speed | Detailed trimming, hobby use |
Secure Your Shaft Safely for Cutting
Before you start cutting, it’s really important to secure your graphite shaft properly. Use some protective clamps that are designed to spread the pressure evenly; this way, you won’t risk damaging the shaft.
Next, make sure to position your shaft on a stable workbench. A firmly mounted vise will help you maintain control and keep everything in place. Just remember, when you apply clamp pressure, it should be just enough to hold the shaft steady without over-tightening.
If you crank it down too hard, you might end up crushing those delicate graphite layers. So, take your time and get it right! Additionally, regular maintenance such as cleaning and sanding golf grips can improve overall club performance.
Properly securing the shaft is essential because it prevents inconsistent swings, which can affect your golf performance.
Use Protective Shaft Clamps
You should always secure your graphite shaft with a protective clamp before cutting to prevent damage. Use rubber or urethane shaft clamps with full-length or 5–6 inch jaw coverage to evenly distribute pressure, avoiding localized stress and fiber crushing.
Choose golf-specific clamps featuring profiled channels or varied hole sizes to fit common shaft diameters (.335″, .350″, .370″) for secure seating. Make certain the clamp has non-metallic contact surfaces or rubber inserts to prevent surface abrasion and micro-fractures.
Position the clamp away from the cut line, applying moderate vise pressure to avoid cracking. Opt for clamps with locking mechanisms or anti-slip grips to maintain stable shaft positioning, reducing vibration and preventing splintering.
Using tools like a chisel or pliers improperly can damage the shaft, so proper clamping is essential to maintain shaft integrity during any modification or removal process, including grip changes with specialized tools.
Proper clamp selection and setup guarantee clean, accurate cuts while preserving graphite shaft integrity. Be aware that some golf shafts may contain chemicals that are known to the State of California to cause cancer, so handle them with care and follow safety warnings chemical exposure warning.
Choose Stable Workbench
A stable workbench forms the foundation for safe, precise graphite shaft cutting by minimizing vibrations and maintaining alignment.
Choose a heavy, rigid bench with a perfectly level surface to prevent splintering and ensure square cuts. Anchor the bench securely to wall studs or the floor to eliminate movement during cutting. Using padding materials around the shaft during handling can further protect it from damage.
Make sure the bench height suits your ergonomics and tool size for steady control. Reserve a dedicated cutting zone with enough overhang so the shaft clears all obstacles. When handling graphite shafts, be aware that the product can expose you to chemicals including black airborne particles that are known to the State of California to cause cancer.
Attach your saw or rotary tool firmly to the benchtop to prevent shifting. Use additional shaft supports to keep the graphite straight and avoid bending stress. Keep power cords routed safely to prevent snagging. This setup guarantees consistent, accurate cuts while protecting the shaft’s integrity.
Avoid Over-Tightening Vise
Although securing the shaft firmly in the vise is essential for clean cuts, over-tightening can cause irreversible damage to the graphite material. You need just enough pressure to hold the shaft steady without deforming or cracking it.
To avoid damage, follow these steps:
- Use a vise with rubber or foam padding to prevent direct metal-to-graphite contact. Graphite shafts are prone to splintering if excessive force is applied.
- Wrap the shaft with a soft cloth or masking tape to protect the surface and reduce splintering. Using carpet tape can be a cost-effective way to add cushioning during this process.
- Apply steady, moderate pressure to prevent rotation or shifting during cutting.
- Inspect the shaft visually for even contact and absence of micro-fractures before starting.
How to Cut Your Graphite Shaft Step-by-Step?
Begin by accurately measuring your graphite shaft to ascertain the exact cut location based on the desired final playing length or tip adjustment. Use a 48″ ruler, mark the cut line clearly with a fine-tip marker on masking tape, and verify measurements twice to prevent over-cutting.
Remove the grip and old tape, then securely clamp the shaft so the cut line extends just beyond the vise jaws, protecting the graphite. Choose a fine-tooth hacksaw or rotary tool with a sharp blade, aligning it squarely to the shaft axis.
Start the cut with light pressure, maintaining slow, steady strokes, rotating the shaft 90° midway to guarantee an even edge. Complete the cut fully before releasing pressure. Finally, remove tape, inspect the cut face for squareness, and smooth edges with medium to fine-grit sandpaper.
Minimize Splintering and Graphite Dust During Cutting
Once you’ve measured, marked, and securely clamped your graphite shaft for cutting, focus on minimizing splintering and dust generation. Use an abrasive cut-off wheel or a fine-tooth hacksaw blade to reduce fiber pull-out.
Wrap clear masking tape tightly over the cut line to support outer fibers and maintain finish integrity. Cut slowly with light pressure, rotating the shaft partially or fully during the cut to guarantee even material removal and lessen localized chipping.
Due to graphite shafts being a fibrous material held together with epoxy, they require a different cutting approach than steel shafts. Control dust by wearing safety glasses and a dust mask, while using local vacuum extraction or placing a damp cloth nearby.
Follow these steps:
- Select appropriate cutting tool (abrasive wheel or fine-tooth blade).
- Apply clear masking tape over the cut line.
- Cut slowly with shaft rotation.
- Use personal protective equipment and dust control methods.
Square and Smooth the Cut End Properly
After cutting your graphite shaft, you need to square and smooth the cut end to guarantee proper fit and structural integrity.
First, check squareness with a machinist square or by standing the shaft vertically on a flat plate, ensuring no gaps appear.
Remove burrs and loose fibers with a fine file or medium-grit (120–180) sandpaper, maintaining a 90° orientation by rotating the shaft evenly. Proper shaft preparation is critical to ensure a strong bond when the shaft is later installed into the club head, so taking care during this step is essential for long-term club integrity.
Use light pressure to avoid crushing fibers or beveling the edge. Progress to fine-grit (220–400+) sandpaper for a smooth, uniform finish, rotating the shaft rather than the sandpaper. Preserve the original diameter by limiting abrasion to the end face only.
Finally, clean debris with a lint-free cloth and inspect for splits or micro-chips to confirm a flawless, structurally sound cut end. This careful finishing helps create the ideal surface for epoxy to bond the shaft securely into the club head.
Prepare the Graphite Shaft Tip for Assembly
To prepare the graphite shaft tip for assembly, start by measuring and marking the exact length needed to match the hosel bore depth plus ferrule length, guaranteeing complete epoxy coverage.
Begin by measuring and marking the graphite shaft tip to fit the hosel bore and ferrule precisely.
Use calipers or a depth gauge to determine the insertion depth accurately, then apply masking tape at the mark for a clean prep line.
Next, carefully remove the paint and finish without damaging fibers using fine-grit sandpaper or a suitable sanding belt, maintaining an even, cylindrical surface. Many professionals recommend using a 1 x 42 machine set to a low RPM around 1700 to ensure safer and more consistent prep work.
Finally, clean the tip thoroughly before assembly.
- Measure hosel depth plus ferrule length; mark with masking tape
- Abrade paint finish gently until uniform dullness appears
- Avoid fiber damage by using fine abrasives and low pressure
- Clean tip with solvent; guarantee dry, residue-free surface before gluing
Avoid Common Mistakes When Cutting Graphite Shafts
Although graphite shafts offer excellent performance, cutting them improperly can lead to costly damage. To avoid common mistakes, always use fine-tooth hacksaws or blades rated for composites. Wrap the cut area with tape to prevent splintering and cut slowly with light pressure.
Measure twice, mark accurately, and clamp securely with padded jaws away from the cut zone. Because there is no “Undo” option for saw cuts, careful measurement and alignment are critical to avoid irreversible errors.
Avoid dull blades and excessive tip trimming to maintain flex and integrity.
| Mistake | Consequence | Prevention |
|---|---|---|
| Using pipe cutters | Crushed, cracked fibers | Use fine-tooth or composite blades |
| No tape on cut area | Splintering and fraying | Wrap with masking tape |
| Poor measurement | Incorrect length | Confirm specs, mark clearly |
| Over-tightened vise | Fiber damage, ovalization | Use padded clamps, moderate pressure |
Frequently Asked Questions
How Does Cutting Affect the Flex and Performance of My Graphite Shaft?
Cutting your graphite shaft changes its flex and performance by increasing stiffness, especially when trimming from the tip.
Butt cutting under one inch causes minimal flex change but reduces swing weight, making your club feel lighter.
You’ll notice more stiffness with cumulative cuts over 1.5 inches. To maintain performance, compensate swing weight by adding weight to the clubhead or grip.
Prioritize proper length fit while managing these flex and balance effects.
Can I Reuse a Previously Cut Graphite Shaft for Another Club?
Yes, you can reuse a previously cut graphite shaft if its tip shows no cracks, delamination, or heat damage under magnification.
Make sure the shaft still meets your target length and swingweight for the new club. Clean out old epoxy and lightly abrade the tip for proper seating.
What Grip Size Changes After Shortening a Graphite Shaft?
When you shorten a graphite shaft, the grip size feels like it suddenly ballooned under your lower hand. The thicker butt section now slides deeper into the grip.
Expect an effective diameter increase of about 0.002–0.004 inches per half-inch trimmed. To keep your feel consistent, add around 1/64 inch of grip build-up for every half-inch cut.
If you cut an inch, consider dropping one grip size or reducing layers of build-up tape.
How Long Should I Wait Before Installing a New Grip After Cutting?
You can install a new grip immediately after cutting and cleaning the shaft.
No wait is necessary before taping. However, after applying solvent and the grip, wait at least 4–6 hours for drying before using the club.
In cooler or humid conditions, extend this to 24 hours for full cure. Proper drying prevents grip slippage or twisting during swings, ensuring reliable adhesion and protecting shaft integrity.
Are There Special Storage Tips for Cut Graphite Shafts?
Yes, you should store cut graphite shafts horizontally on multiple supports to prevent sagging.
Protect cut ends with caps or tape to avoid fiber fraying and splinters.
Keep shafts in a dry, temperature-stable environment away from direct sunlight, heat, or freezing.
Avoid shaft-to-shaft contact to reduce cosmetic damage.
Clean off dust and adhesives before storage, and label shafts clearly to minimize unnecessary handling and preserve their flex and integrity.
The Final Cut That Elevates Your Game
Cutting a graphite golf shaft might seem straightforward, but precision is key to maintaining performance and safety. By measuring carefully, choosing the right tools, and securing the shaft properly, you minimize splintering and guarantee a clean cut.
Remember, trimming the butt end versus the tip affects club balance differently. Your attention to detail not only preserves shaft integrity but also enhances your game. Mastering this process proves that precision in preparation leads to better results on the course.